How-Two: Round Brush Blowout
By Alina Avery
How-two: 2 easy steps to doing something just a little bit better…
As the weather gets colder, leaving the house with wet hair is not an option. I also hate to sleep with wet hair (damp hair + warm head + pillow = gross things growing where you put your face), so drying my hair is pretty much a necessity. While I’ve been #blessed with hair that dries pretty straight and smooth, I’ve always been thrilled with how my hair looks when it’s blown out at a salon and have dedicated hours and hours to replicating those results at home. Here’s two little tricks that work for me to get a salon-worthy round brush blowout.
Before we get to the actual two things, here’s a freebie: get your hair almost dry before you start trying to style it. Either wait for it to air-dry to about 85% or blast the roots with your blow dryer, lifting with your fingers, to rough dry before trying to smooth and shape your hair. It will make everything so much easier.
- Pay attention to your sections. This depends entirely to what tools you’re using. When you section your hair, choose a piece that’s no wider than the barrel of your brush or the length of your dryer’s nozzle. You want to be able to lay the hair flat on the brush and hit the whole section with air at once. Similarly, you want the section to be no thicker than the length of your bristles, so the whole section can be held by the brush at once. It will be a lot easier to manage than if your sections are too big or too small. The general idea is that you want to keep tension in the hair by pressing it against the brush with the air stream from your dryer, so getting the right sized section is key.

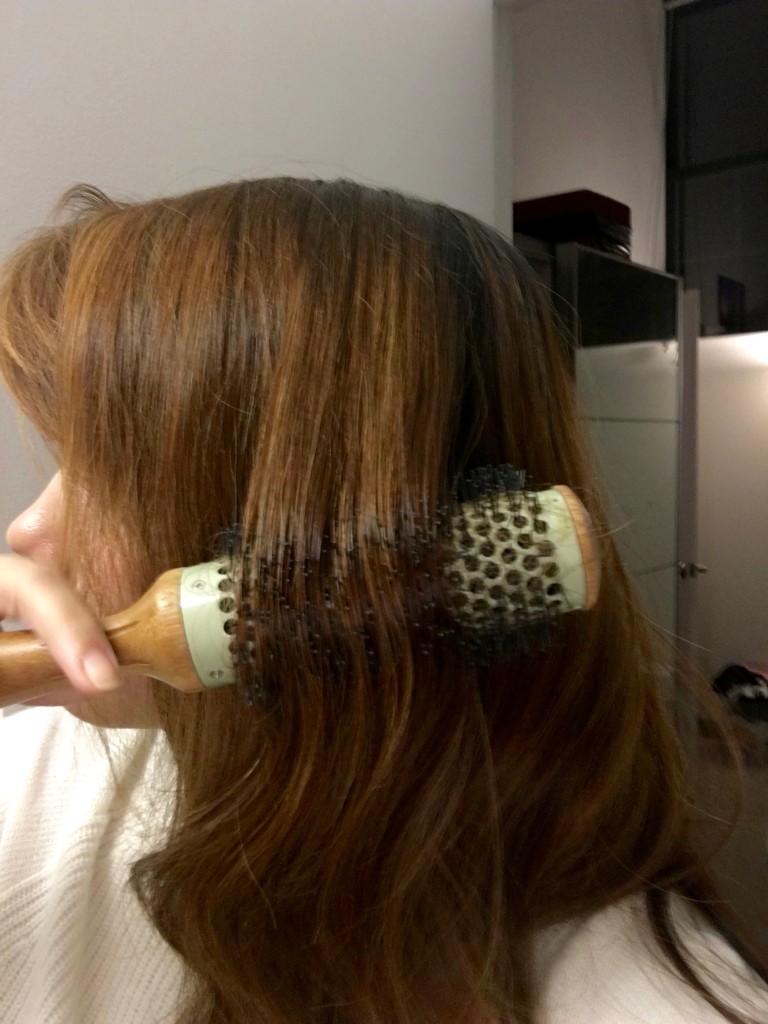
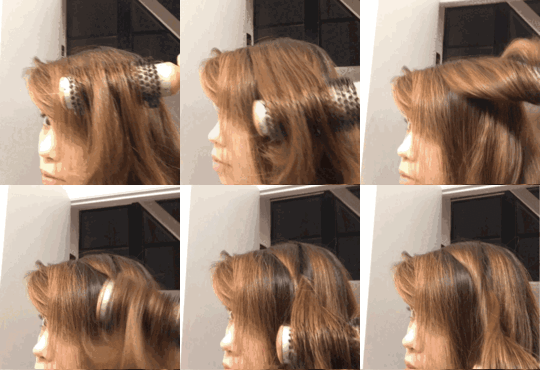
- Twist your hair as it comes off the brush. This is going to be a hard one to explain. Section the hair as described in step one. Place the brush behind the section of hair and direct the air to press it into the bristles. Gently slide the brush down the hair, twisting backwards as you go to keep contact between the brush and hair. Once you’ve made a full rotation, slide the brush down the hair without twisting, and then without sliding, twist the brush another full rotation. This will create a “coil” of hair above where it meets the brush. You can continue the pattern until you reach the end of the section. As the hair comes off the brush and out of the air stream, it will begin to cool. Hair stays in the direction it cools, so if it’s being pulled taut, you’ll end up with smooth but straight hair. If it’s twisted instead, you’ll end up with more waves and texture. For looser curls, choose a larger brush to allow for larger sections. For tighter curls, go for a smaller brush, and therefore, smaller sections.
 <
<
A closer look, this time twisting towards my face instead of away:
Making these gifs by myself was probably one of the top ten trickiest things I’ve ever done.
Here’s the final result (awkward office selfie):


